Poor Man’s QTake

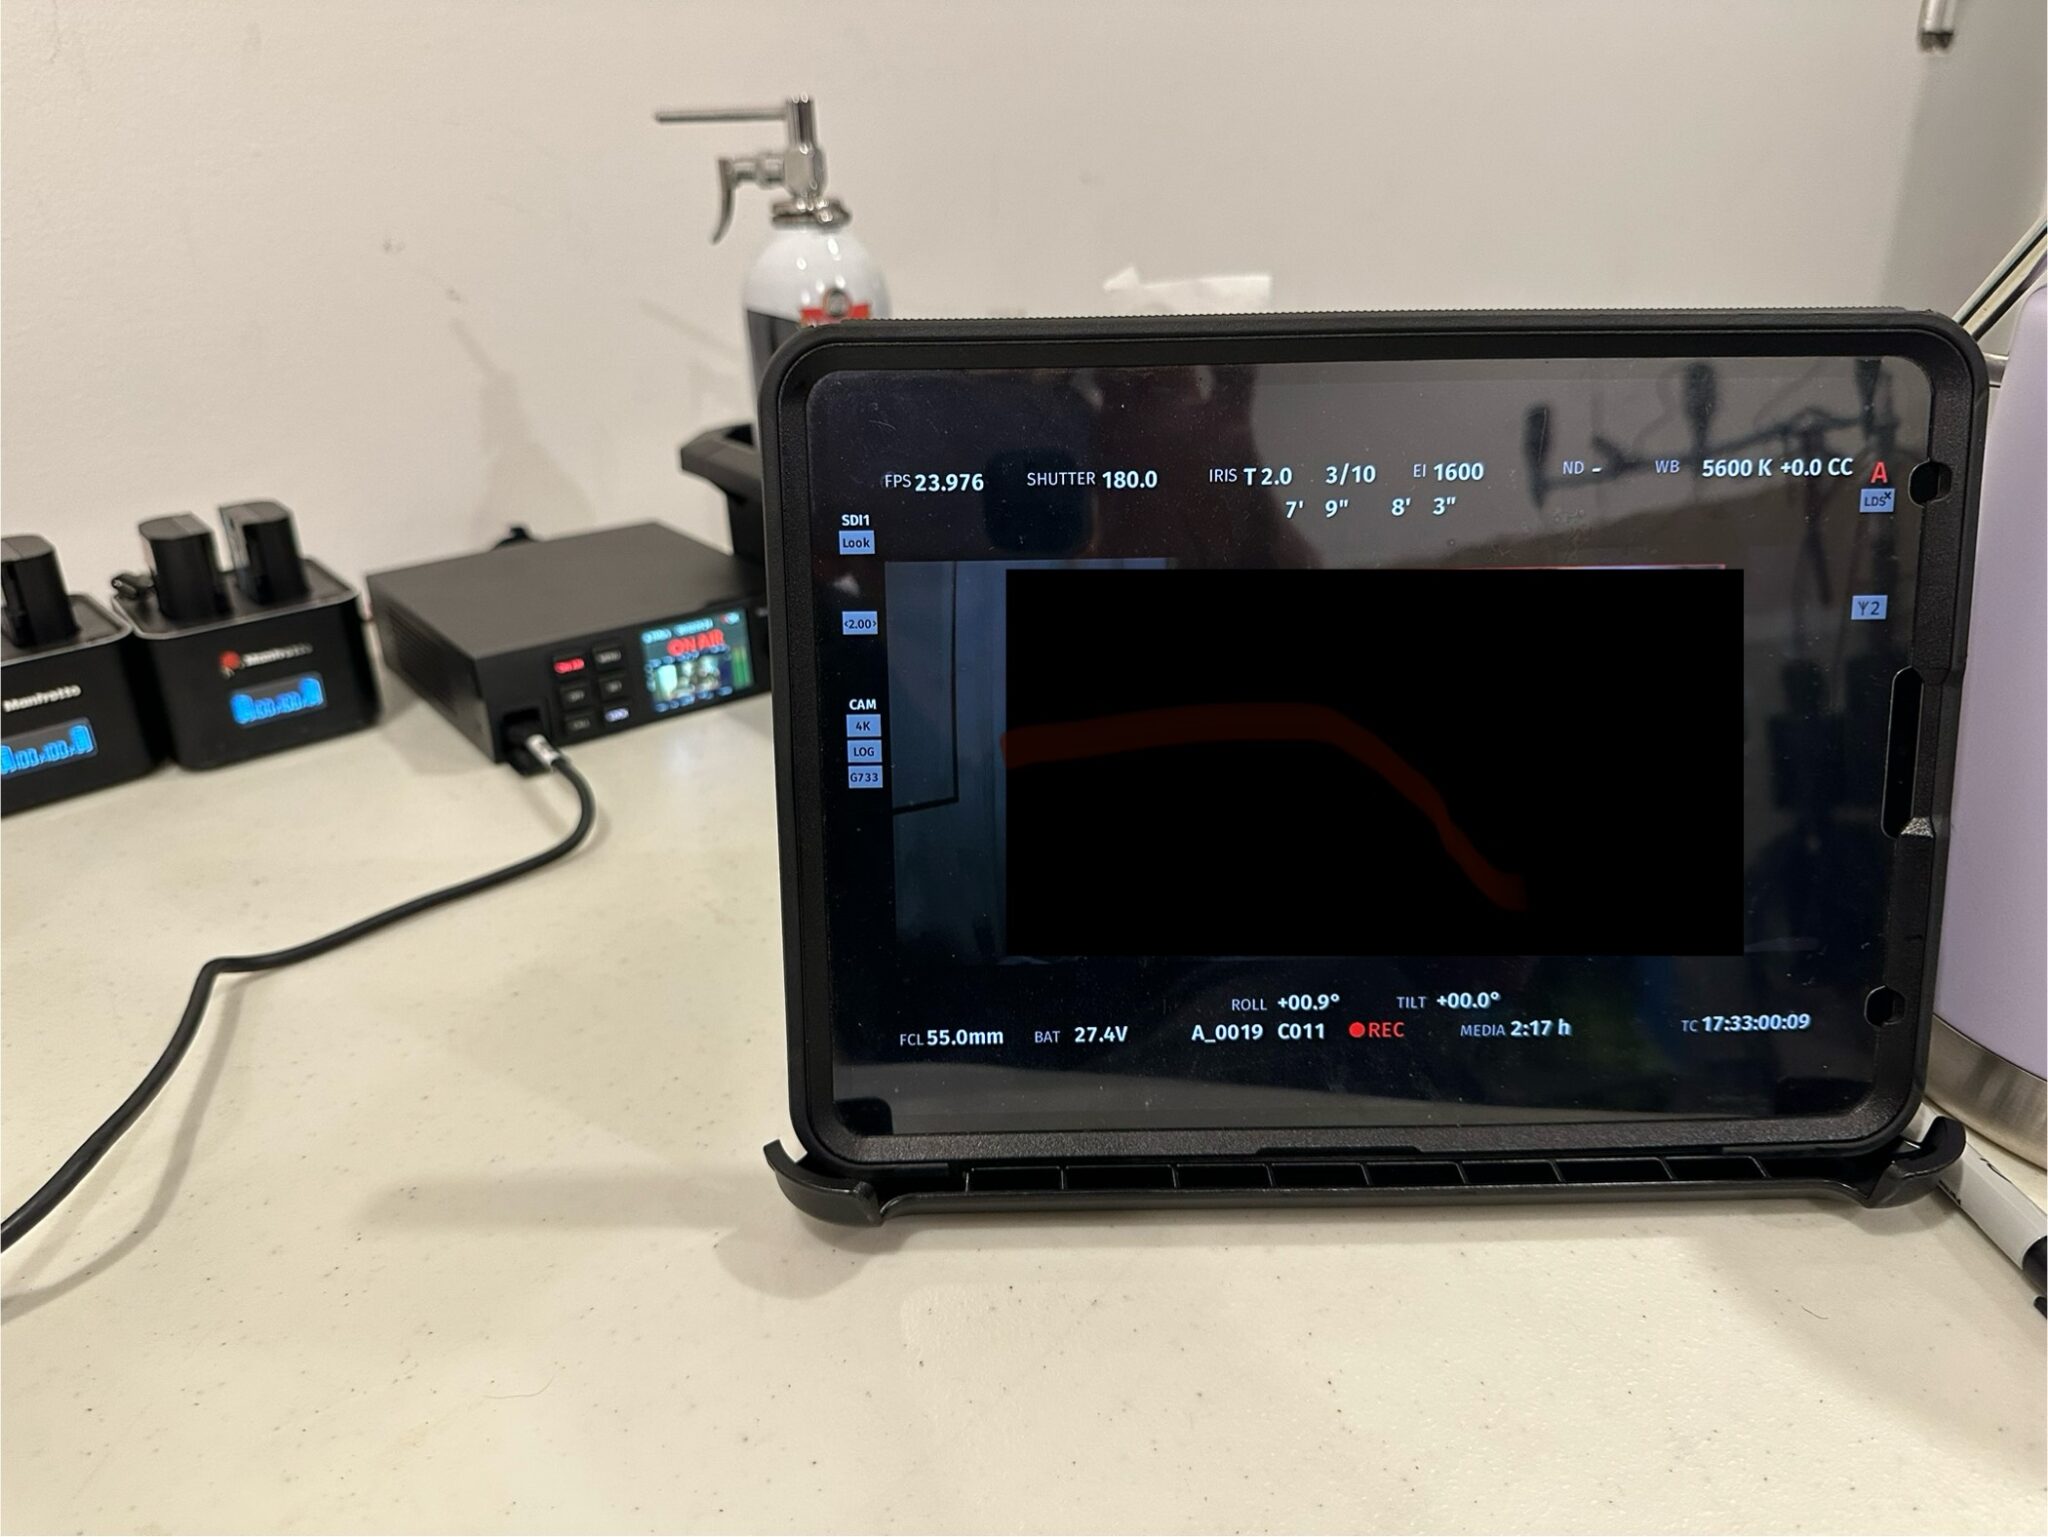
On my current show, I needed to have access to the video feed from the DIT cart, but resources were limited and we sadly did not have a video assist/playback person to help. On large budget projects you would typically install the QTake app on your iPad so you didn’t have to stand in the often crowded space next to the monitor, but what to do on this one?

I came up with a solution. Sound was kind enough to let me attach a BNC cable to their video out port on their cart, and from there, I needed a few more pieces of tech. These were:

  1. A BlackMagic Design Web Presenter HD – $515 new at BHPhotoVideo.com; likely cheaper used on eBay
  2. A Raspberry Pi – I had a RPi 3 Model B Plus hanging around, which works just fine. You can pick a new RPi 5 up from adafruit.com for $80 and a case for $15.95.
  3. An Ethernet Cable
  4. A reasonably modern iPad with the VLC app

First, you need to provision the RPi. I used their handy Raspberry Pi Imager to install. The link is a macOS download; just search the internet for Raspberry Pi Imager for other operating systems. Be sure to set up your new RPi to connect to the same WiFi that your iPad will eventually connect to, and turn SSH on.

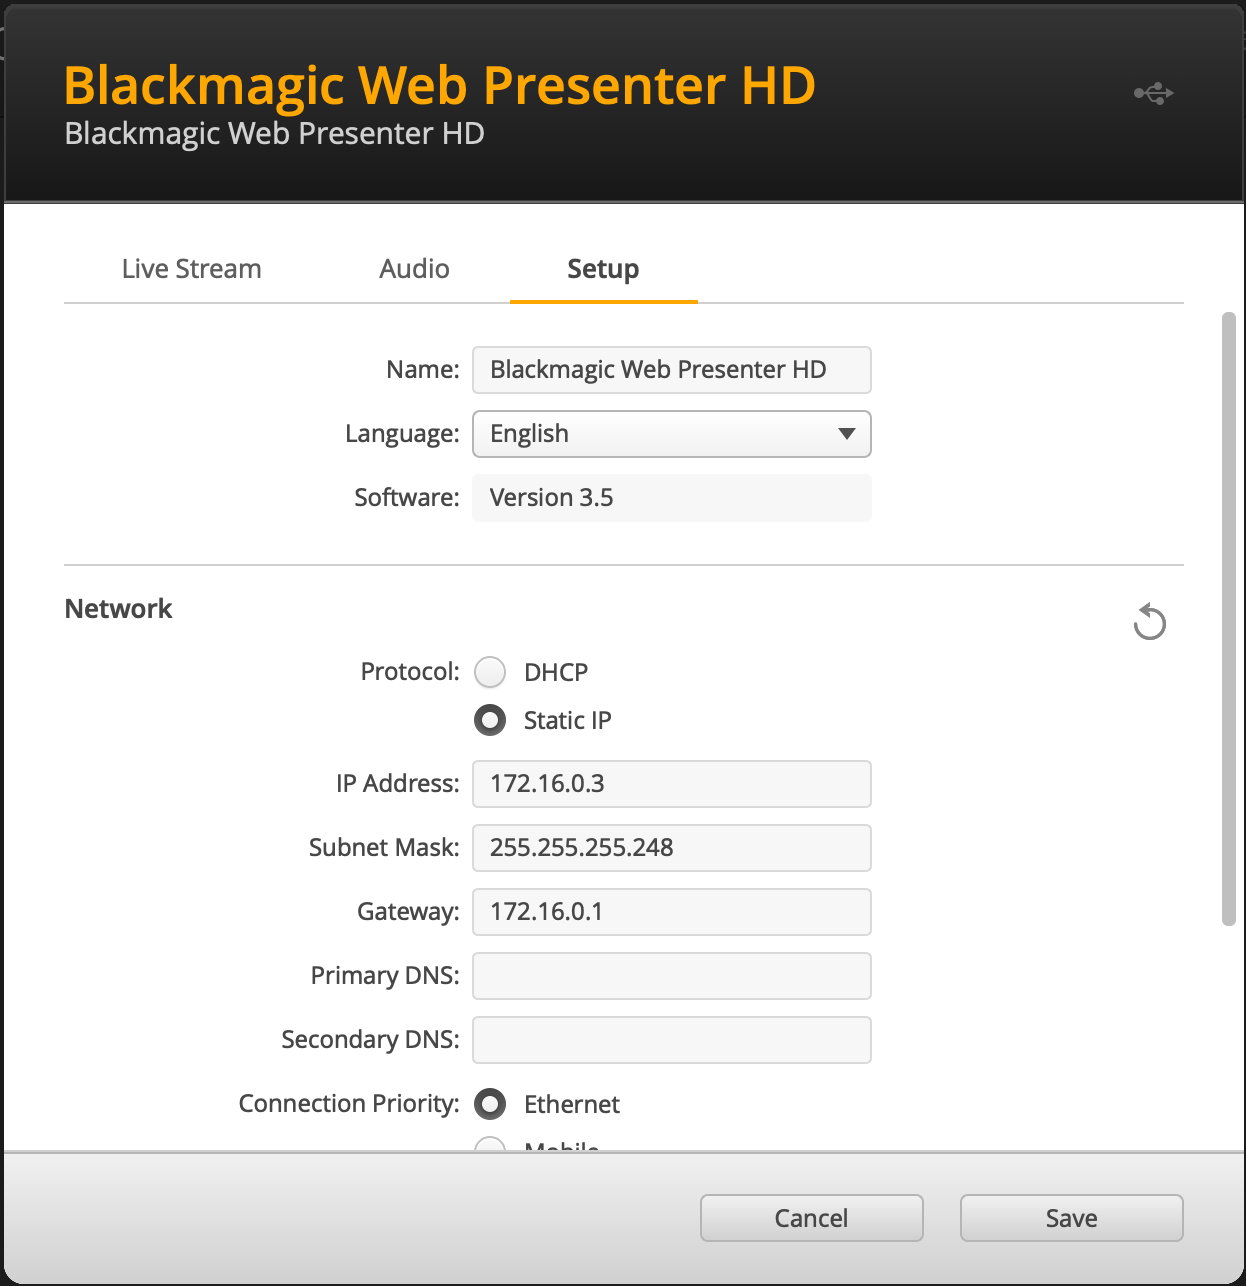
When the device is powered up, SSH into it, connect an Ethernet cable between the Web Presenter and your RPi, and assign a static IP address to the wired Ethernet port:

sudo nmcli c edit "Wired connection 1"set ipv4.method manualset ipv4.address 172.16.0.2/29save persistentactivatequit

Next, you’ll need to set up a RTMP server on your RPi. I asked ChatGPT for help on this – I’ve edited the instructions somewhat after I tested them to make sure that they work.

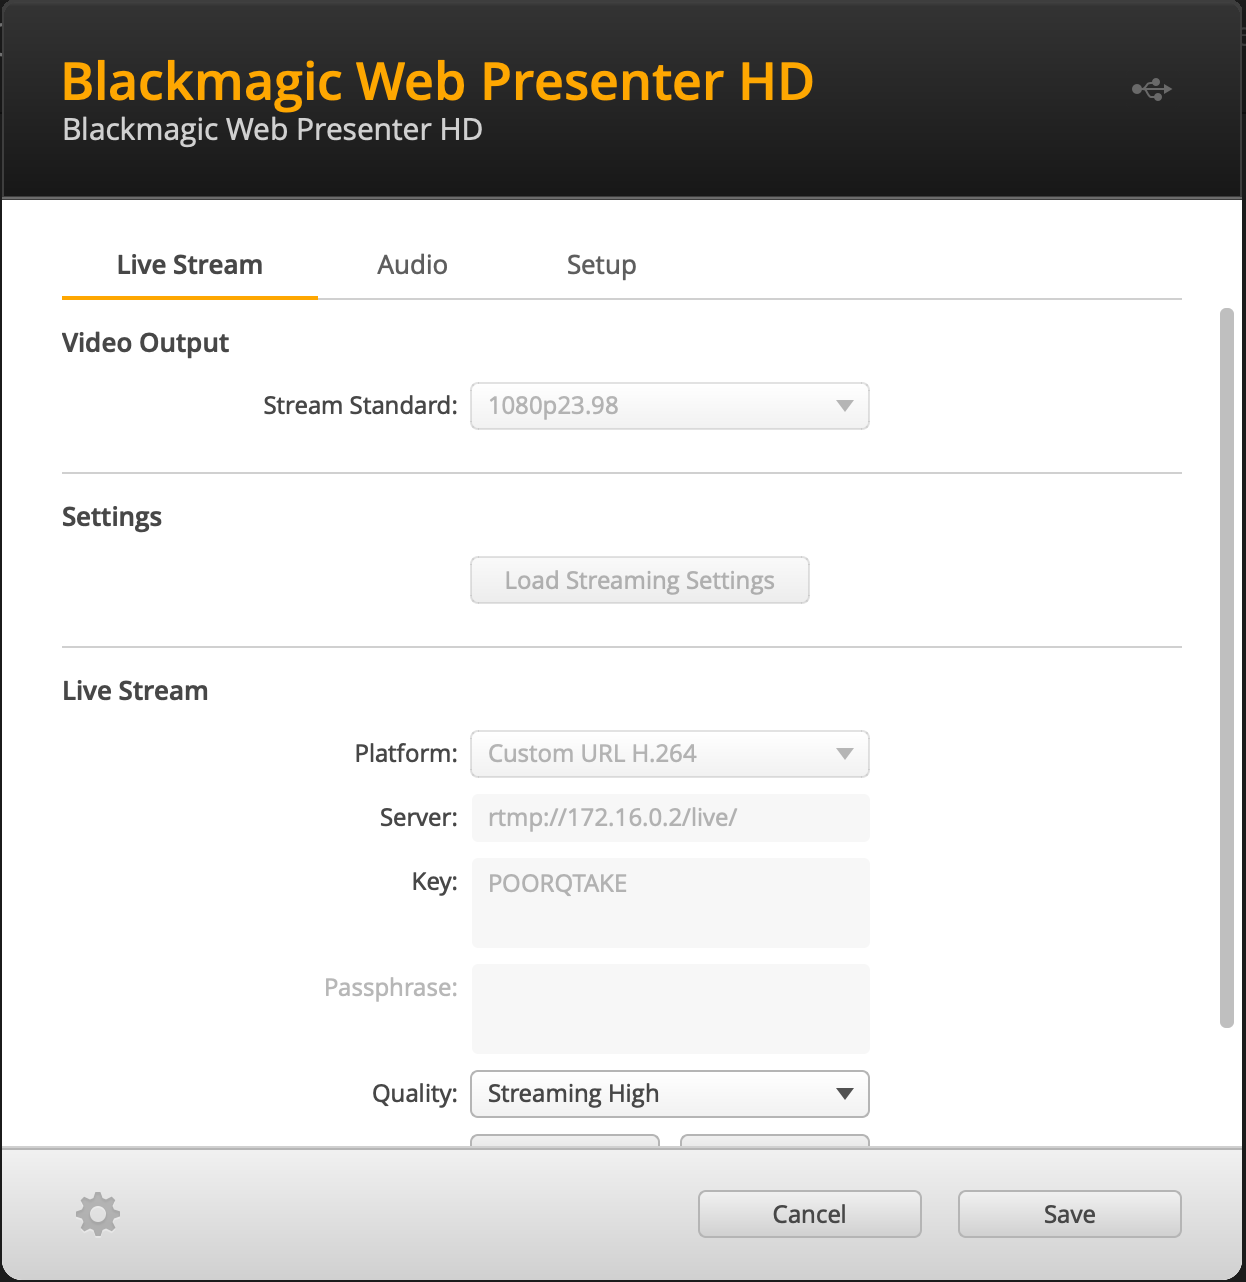
Now, time to configure the Web Presenter. BlackMagic’s Web Presenter Setup utility is super easy to use. The download link is once again for macOS. I set it up as follows:

I chose “POORQTAKE” as a key for my live stream, and clicked the “On Air” Button on the front of the unit.

Last, on the iPad, I launch VLC, click the “Open Network Stream” button, and use the URL rtmp://YOUR.RPI.WIFI.IP/live/POORQTAKE, and click “Open Network Stream”, and there you have it!

Setting up a RTMP Server on a RPi

Setting up an RTMP (Real-Time Messaging Protocol) streaming server on a Raspberry Pi can be done using a software package like NGINX with the RTMP module. Here’s a step-by-step guide to get you started:

Requirements:

  • A Raspberry Pi (preferably a 3B, 3B+, or 4 for better performance)
  • Raspbian or Raspberry Pi OS installed
  • Internet connection

Step 1: Update Your System

Open a terminal and update your system packages:

sudo apt update
sudo apt upgrade -y

Step 2: Install Dependencies

You need to install the required dependencies to build NGINX from source:

sudo apt install -y build-essential libpcre3 libpcre3-dev libssl-dev zlib1g-dev libpcre3 libpcre3-dev openssl libssl-dev

Step 3: Download NGINX and the RTMP Module

You will need to download both NGINX and the RTMP module:

cd ~
wget http://nginx.org/download/nginx-1.25.2.tar.gz
wget https://github.com/arut/nginx-rtmp-module/archive/refs/heads/master.zip

Unpack the files:

tar -zxvf nginx-1.25.2.tar.gz
unzip master.zip

Step 4: Build and Install NGINX with RTMP Module

Navigate to the NGINX source directory and configure the build:

cd nginx-1.25.2
./configure --with-http_ssl_module --add-module=../nginx-rtmp-module-master

Compile and install:

make
sudo make install

Step 5: Configure NGINX for RTMP

Edit the NGINX configuration file located at /usr/local/nginx/conf/nginx.conf:

sudo nano /usr/local/nginx/conf/nginx.conf

Add the following RTMP configuration to the nginx.conf file:

worker_processes  1;

events {
worker_connections 1024;

}

http {
include mime.types;
default_type application/octet-stream;
sendfile on;
keepalive_timeout 65;
server {
listen 80;
server_name localhost;

location / {
root html;
index index.html index.htm;
}
}

}

rtmp {
server {
listen 1935;
chunk_size 4096;

application live {
live on;
record off;
}
}

}

Save the file and exit.

Step 6: Start NGINX

You can now start NGINX using the following command:

sudo /usr/local/nginx/sbin/nginx

Step 7: Test Your RTMP Server

To test your RTMP server, you can use a streaming software like OBS Studio:

  1. Open OBS Studio and go to Settings.
  2. Under Stream, select Custom.
  3. Enter the RTMP server URL: rtmp://<Your-Raspberry-Pi-IP>/live
  4. Set the stream key to whatever you like.

Step 8: Verify Your Stream

To view your stream, you can use a media player like VLC:

  1. Open VLC and go to Media > Open Network Stream.
  2. Enter: rtmp://<Your-Raspberry-Pi-IP>/live/<stream-key>.

Optional: Enable NGINX on Boot

To have NGINX start automatically on boot, add it to your rc.local:

sudo nano /etc/rc.local

Add the following line before exit 0:

/usr/local/nginx/sbin/nginx

Save and exit.

You’re Done!

Your Raspberry Pi is now set up as an RTMP streaming server. You can stream video content to it and serve it to multiple clients.

VFX Supervision on “Breathe”

VFX work on Thunder Road’s “Breathe” by Brainstorm Digital

In March of 2023, I met with Thunder Road, and during the initial meeting, they asked if I might be interested in taking over VFX Supervision duties on a film they had recently completed principal photography on – “Breathe“, directed by Stefon Bristol, and starring Jennifer Hudson, Milla Jovovich, Quvenzhané Wallis, and Sam Worthington.

This movie is set in Brooklyn, New York in the year 2039. In this world, due to the ravages of man-made climate change, the oxygen has vanished from Earth’s atmosphere, and the oceans have evaporated. All that remains is a desert wasteland, devoid of life, where all oxygen-dependent life forms have gone extinct. All, except for a very clever family, who have figured out a way to produce oxygen, grow food, and survive inside a heavily-fortified former nursery in Bushwick.

The movie was entirely shot in Pennsylvania. Exteriors were filmed in a neighborhood in Chester, PA; interiors on a sound stage, and a few additional exteriors were shot in downtown Philadelphia.

The VFX challenge here was to take the exterior photography and realistically set it in a post-apocalyptic, desiccated New York. Special care had to be taken to ensure that no green plant life was visible anywhere. In addition, we had to fully consider how the built environment would react to an atmosphere devoid of oxygen and moisture. Metal would not rust, and concrete would rapidly lose its structural integrity, as two examples.

In order to bring our director’s vision to life, I turned to the following creative partners:

We were able to complete a total of 394 visual effects shots in a period of 10 weeks. These included construction of 7 distinct all-CG environments; 6 NYC environments were done by Brainstorm, and the Philadelphia exteriors were done by Nexodus.

I couldn’t be more proud of the work that we were able to pull off on this project. The environments that we built really contributed to the sense of isolation and dread that the heroes in our story felt. Principal photography did not take place in many exterior locations, and the VFX in this film really fleshed out the world that Stefon Bristol was trying to build.

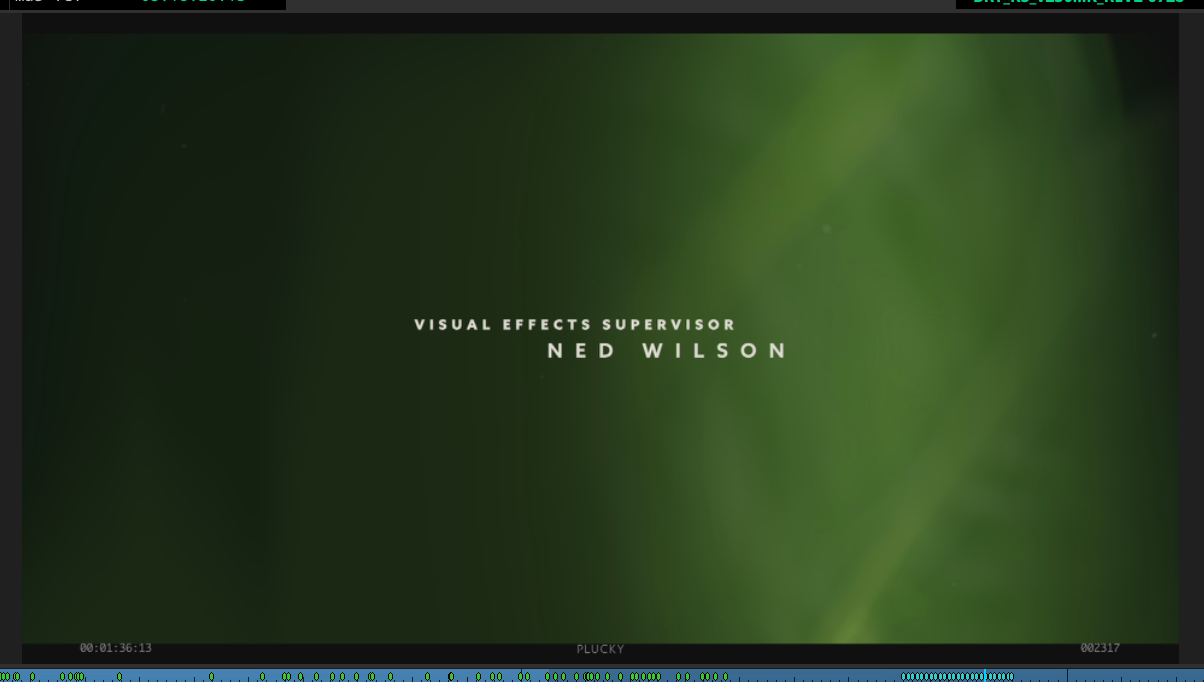
As a parting gift, Mr. Bristol was kind enough to reward me with a main-on-end credit on his film – my very first! It looks good here coming from the Avid, but it looked even better seeing it on the big screen in April of this year!

The Beer Barrel/Flanders Red Experiment

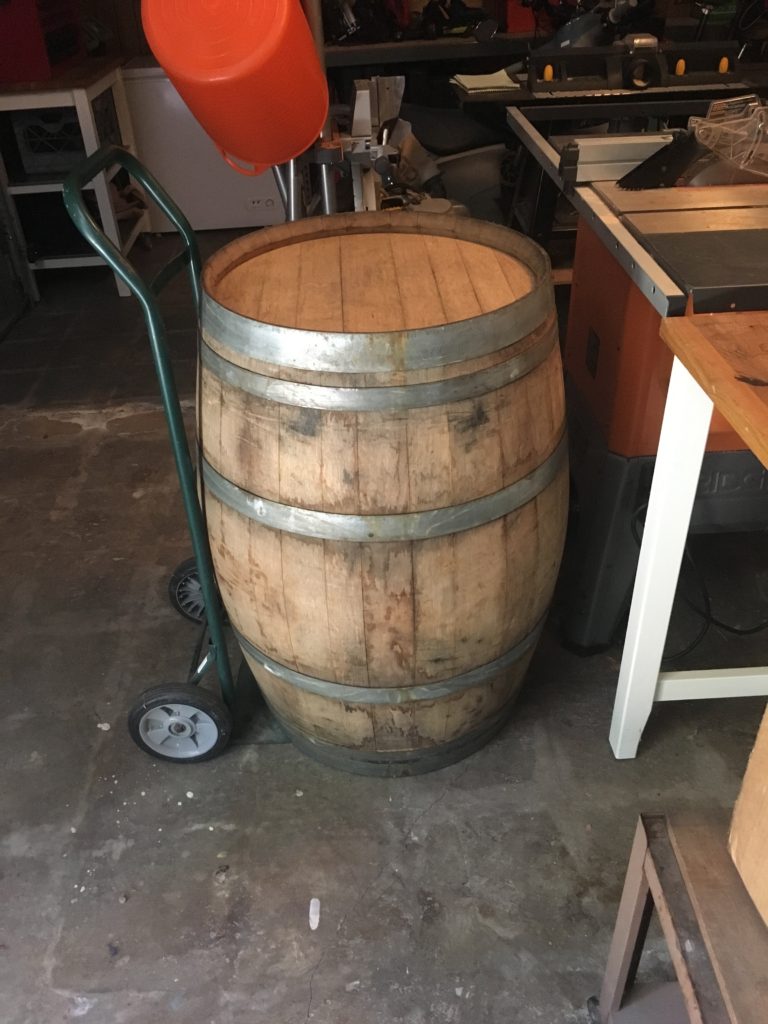
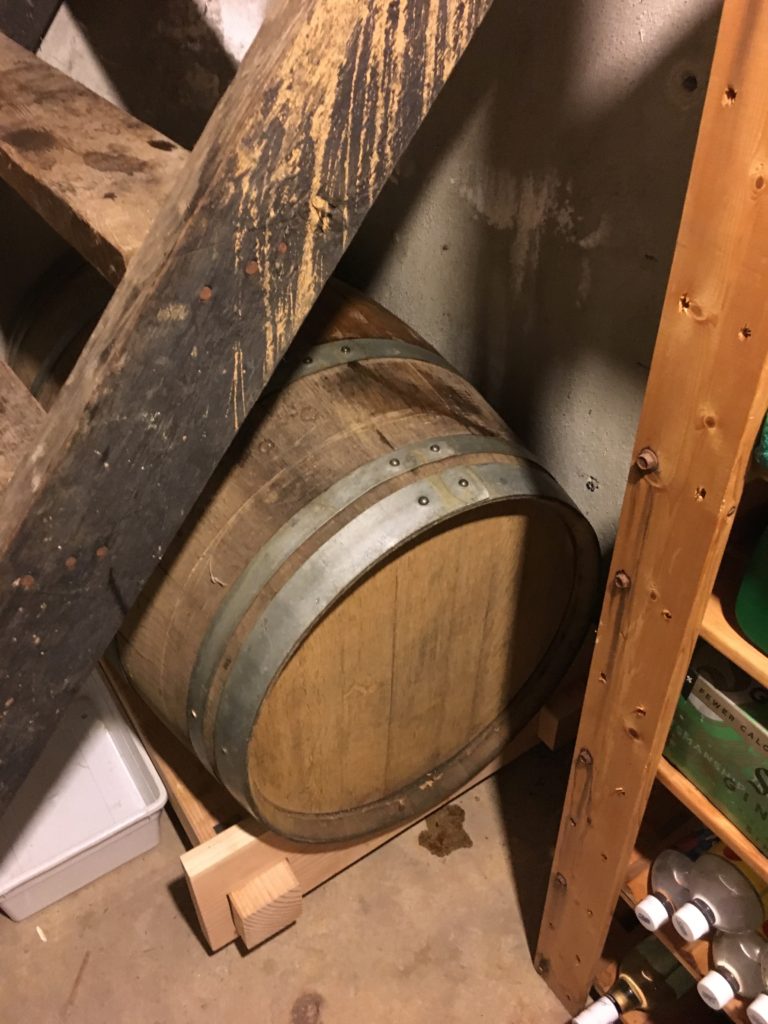
Back in October 2016, I went to a garage sale at the Eagle Rock Brewery. Most of the guys who are involved with that fine establishment have been and still are avid home brewers. The garage sale was a treasure trove of goodies, and I scored this sweet, 59.6 gallon used wine barrel for $50. I believe the wine barrel was originally used at a vineyard in France. The Eagle Rock Brewery guys used it to barrel age a sour. Here’s the barrel just sitting in my garage:

Barrel on the hand cart

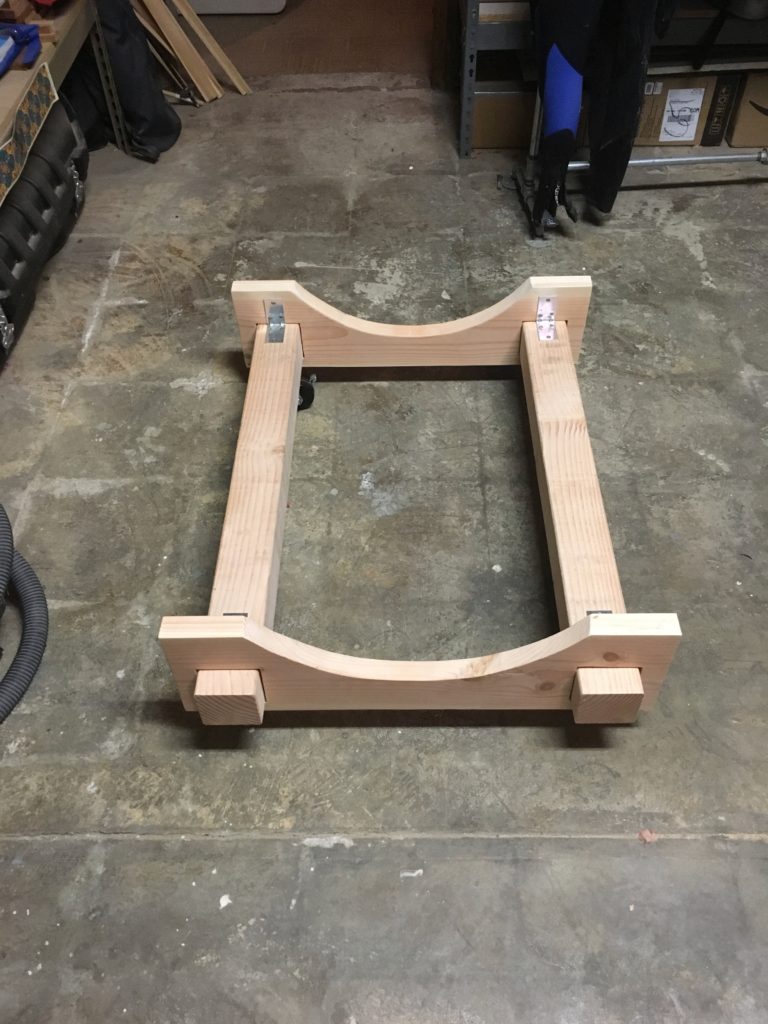
I needed to be able to lay the barrel on its side in order to fill it. Morebeer.com sells metal wine barrel racks for about $100, however, their profile was too tall, and I needed the rack to be on casters. It would eventually live underneath my basement stairs, so I needed to make sure that it took up as little space as possible. I also thought that it would be a lot easier to deal with if I could roll it around while full, hence the casters. So I built this:

Wooden barrel cradle

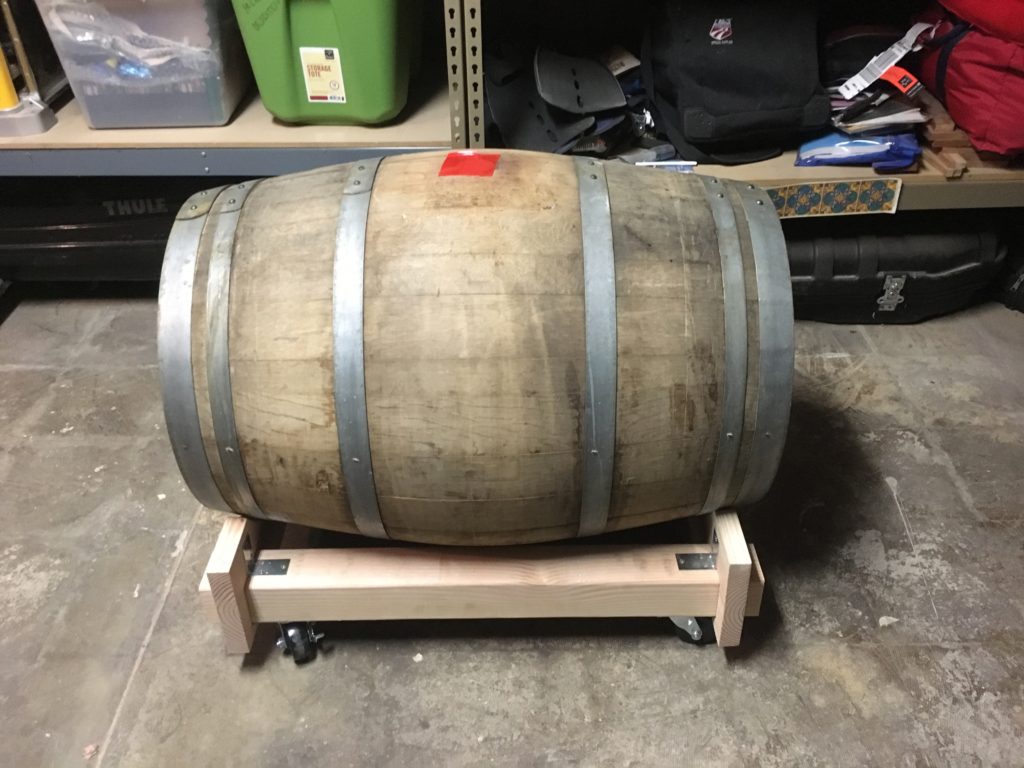
The barrel sits nicely in the cradle, and it looks pretty smart too, if I do say so myself:

Barrel sitting in the cradle

Now, I needed to fill it! The most laborious process here involved brewing 60 gallons of Flanders Red. Sadly, my home brew setup only allows me to brew 5 gallons at a time, so, this took four weekends of hard work. I pitched two packets of Roseleare Ale Yeast when I brewed the first batch, but after that, I just added more wort. Since this would be a sour beer, I didn’t need to be as fastidious about my sanitation as usual. In order to speed up the process considerably, I cooled the wort by tossing in 10 pounds of ice. Brought it down to about 65º in a matter of minutes! Also, since the recipe called for a 90 minute boil, it helped get my gravity close to the target original gravity of 1.061.

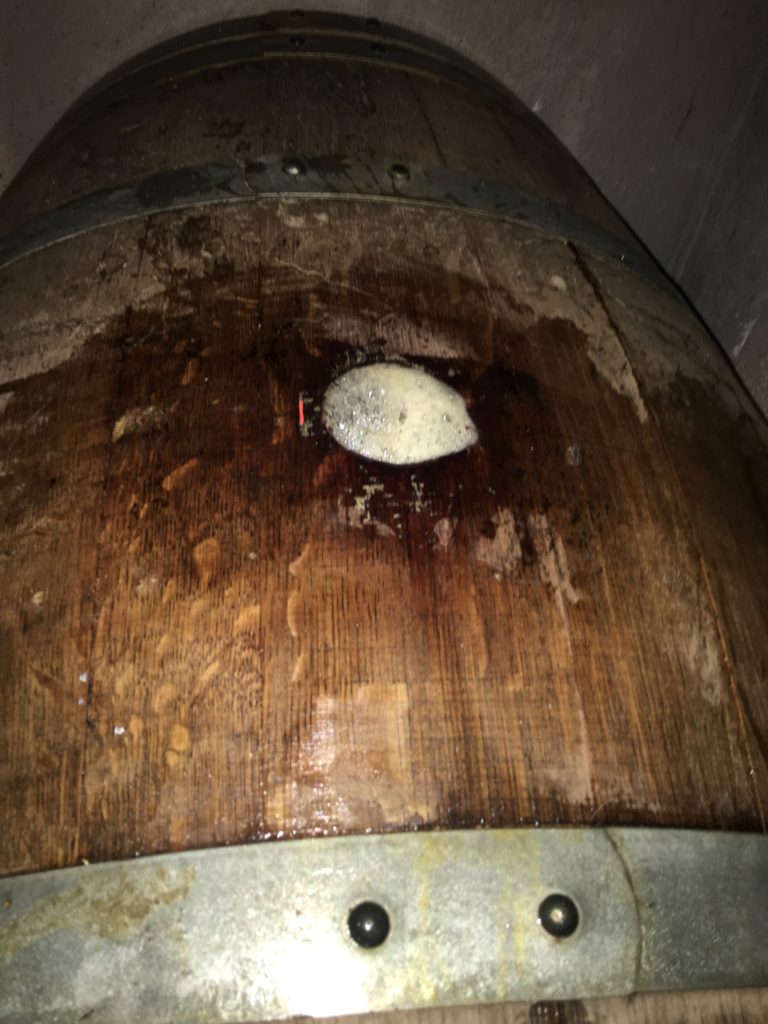
On October 30, 2016, I finally filled the barrel! Here it is, up to the brim:

Barrel full to the top!

I got the gravity relatively close to the target – my final number was 1.060. I calculated this rather unscientifically by taking a gravity reading for each 5 gallon batch, adding them all together, and dividing by 12. So, assuming each batch was exactly 5.000 gallons, this number will be totally accurate!

Here is the full barrel, tucked neatly under the stairs:

Barrel safely stowed under the basement stairs.

I’m going to taste this after 6 months of aging, on April 30th, 2017. I plan on aging it for 18 months, so I plan to filter it and transfer it to kegs on April 30th, 2018. I can’t wait to share with all my friends!


Lexus LaceUp Series – Ventura Half Marathon Race Report

This is the first race in a series of races as I train and prepare for my Boston qualifying attempt on May 28th, 2017.

This race took place on Saturday, October 22nd, 2016, with a start and finish at Surfer’s Point, in Ventura, CA.

For readers who have not been to Ventura, I highly recommend it as both a city to check out and as a host city for endurance events. I have done several triathlons here previously. Most of the events take place right on the water, and it is usually quite cool, even in the summer time.

I was particularly concerned about this race, as I had come down with a sinus infection the previous weekend. I felt under the weather throughout the week, and had missed three different training runs. I stayed late at work on Friday night and got in to Ventura around 9:00 pm. By the time I got some dinner and got settled for the night, it was around 10:30 pm. I stayed in a lovely AirBnB on Friday night that was about a mile away from the starting line. However, I was unable to get to sleep immediately, so when I awoke up at 5:30 am, I estimate that I had a little over six hours of sleep, which was not ideal.

When the alarm rang, I checked the weather on my phone and it said that it was 56º out, and from the sound of the windows rattling around, it was also a little windy. Sadly, I had to leave my phone in my room, as I was by myself and didn’t want to carry it, so I don’t have any pictures to accompany this post.

I ate a Luna bar, drank a bit of water, and jogged the mile to the starting line, having left my AirBnB at around 6:00 am. I signed my waiver and stood in line for my bib number and timing chip. By the time I had all of my paperwork in order, I was actually a little chilly, so I went for another 8 minute jog down the beach.

The race started at 7:00 am, so at around 6:50, I made my way to the starting line. There were no corrals at this event, nor were there elite runners. There were several pacers visible, so I figured I would stick with the 1:40 pacer as my goal pace for this race was 1:38:15.

The organizers were prompt, and the race started at 7:00 on the nose. There was no starting gun or air horn, since they wanted to be quiet for the neighbors. Instead, they had a lady come out and shout “3, 2, 1, GO!!!”. Somehow, it felt a little more personal than an air horn. I was off! My coach had warned me to try and keep the pace between 7:25 and 7:35, and if I was really struggling, to not go slower than 7:45. To heed her advice, I figured I would stick with the 1:40 pace group, but it seems that the pacer was a little over eager, as we completed the first mile in 7:18! It would appear that he realized this and slowed way down, but I kept going, so for the majority of the race I was running by myself.

I neglected to heed my coach’s advice for the next couple of miles. The first part of the race is a loop that goes South for a mile and a half along a road, and then hooks back up with the shore line bike path and heads North to return to the starting line. I believe that this is the entire 5K course. The sun had not yet risen, it was cool, flat, and sheltered from the wind. I felt very strong, and my heart rate stayed in the 160-range, so I figured I was OK.

Turns out, I had made a grievous error in judgement; I had started too hard. Around mile 3.5, the shore line bike bath took a hard right turn, and began to head inland, up the hill towards Ojai. The sun had come up at this point, and I had neglected to wear sunglasses. The worst part, however, was that it was quite windy that day, and as I begin to head up the hill, I was faced with what seemed to be a 20-mph head wind. I slowed down considerably, from 7:25 a mile to 7:37 and then 7:43. I remembered that I couldn’t go slower than 7:45, but I was giving it everything I had to make that pace.

The turnaround was at mile 8. After I came through it, what was once an uphill battle facing a head wind was now a gentle downhill with a tail wind. My pace picked back up again, and I was feeling more confident. However, I tried to remind myself that I shouldn’t go faster than 7:20.

The sun had risen at this point and it was warming up considerably. There was not a lot of shade on the bike path, and around mile 10.5, I started to really feel it. It wasn’t that my heart rate was too high, it was hovering around 172. It felt as if I had ran out of gas, and that my legs didn’t have anything left. I had been munching on Clif Blocks – one every 10 minutes or so, but this time, I ate two, for a little extra kick. After about a half a mile, I felt better, and continued to press on. I was sticking to around a 7:25 pace.

Just after I passed the marker for mile 12, I felt the same exhaustion again, except this time it was considerably more intense. The downhill of the bike path had transitioned into a slight uphill on city streets, and we were now in full sun. My pace slowed down to 8:00, and my heart rate spiked to 180. I was really struggling at this point. Fortunately for me, a lady that I had seen at the starting line and had struck up a conversation with passed me. I recognized her, said hello, and she gave me some words of encouragement.

It was just what I needed to hear. I realized that I had less than half a mile to go, so I gritted my teeth and decided to push as hard as I possibly could. I got my pace down to 7:43, and when I passed the marker for mile 13, I transitioned to as much of a sprint as I could muster.

I crossed the finish line and stopped my watch. I had done the race in 1:38:59. This was slightly slower than my goal pace of 1:38:15, but my GPS said that I had gone 13.24 miles, which is a little longer than a half marathon, so in reality, I had actually beaten my goal pace by a couple of seconds. It’s not official, but I’ll take it!

I felt light headed and a little nauseated after I finished, as I had given it everything I had. After I stretched out, got myself some pizza, a little water, and even a free beer and a massage, I felt much better!

I would definitely run this race again. I felt as though the water stops were a little infrequent, but then again, I probably could have done a better job with hydration the night before and the day of.

Here are the official results of my finish:

Ventura Half Results

Here are the nitty-gritty details, from Garmin Connect:

https://connect.garmin.com/modern/activity/1417222576

Thanks for reading!

Why not try and qualify for the Boston Marathon?

In April of this year, I decided that I would try and qualify for the Boston Marathon. I don’t believe that I was born a talented athlete; in fact, far from it. However, I figured out in my early thirties that I was actually pretty decent at endurance sports. I might not be super fast, but I had the determination, desire, and the build to run for long distances.

After you run a couple of marathons, and an assortment of 10k races and the like, where do you go from there? I love triathlons as well. I have done a half Ironman, along with several sprint and Olympic distance races. The next logical step might be a full Ironman. This scares me a little bit though. The volume of training required for a full Ironman is tremendous. Sure, you could do less if you just want to finish, but I’d like to do more than just finish. I’d like to finish strong.

Maybe for the next year or year and a half, I should focus on my running, and see if I can do something that most would consider impossible: qualify for the Boston Marathon. When I made the decision, I was about to turn 37. In my age group, men ages 35-39, I would have to run a qualifying race in 3:10:00 or better. That’s a 7:15 pace per mile. That seems pretty daunting, especially when you consider that beating 3:10 doesn’t necessarily guarantee you a spot in the race; it depends on how many other people in my age group qualify that year, as spots are limited and awarded based on your qualifying time.

My fitness at the time was not terrible. The last 10k race I had done was on 12/05/2015, and I completed this in 47:31. According to my GPS, it was a distance of 6.26 miles, with an average pace of 7:36 a mile. Then, I checked the race time predictors that are available online. In order to run a 3:10 marathon, I should probably be able to run a 10k in 41:17, at a pace of 6:39 per mile. That’s an improvement of nearly a minute per mile. I think, when I was 12 or 13, I ran a mile in 6:36. The last time I attempted to run a mile where I actually kept records was on 05/15/2011. That day, I ran the mile in 6:44. So how in the hell do I get from a 47:31 10k to a 41:17 10k?

I guess it was time to get serious. I reached out to my friend Taryn and asked her if she would consider coaching me. She agreed, and has been invaluable in helping me along the way. I figure that anyone who has ran 35 marathons (now, probably 40) could offer some pretty relevant advice on how to run just one.

As I write this, I am just shy of six months into the training. The first four months were dedicated to building a good, solid base. Right now, I am focused on training for the California International Marathon, on December 4th. This is going to be my first prep race, just to see how I do. I am going to attempt to qualify for the Boston Marathon by running the Mountains 2 Beach Marathon on May 28th, 2017. Yesterday, I ran a half marathon in 1:38:59, which is a dramatic improvement from where I was. Maybe next May I’ll make it!!!

MacOS idle time daemon

I put together a pretty simple daemon which has been compiled for and tested on MacOS 10.9.1 Mavericks. It is designed to run in the background, and at pre-set intervals check the system idle time. When that idle time meets or exceeds a pre-configured value, the daemon runs an executable. When the user moves the mouse or presses any key on the keyboard, the daemon will execute another program.

This can be incredibly useful if you would like workstations to participate in a render farm if they are idle for a certain amount of time, but remove themselves from the farm when they are being used by an artist.

To use, start by downloading the installer:

idleexecd

Or, if you would like to see how I did it, build it yourself, or use the code for something else:

idleexecd.src

Configuring the daemon involves two mandatory steps, and one optional one.

First, edit the configuration file, located at /Library/Preferences/org.n3d.idleexecd.config.plist. I originally wrote this to put machines on a Deadline render farm, so it is configured to do just that. The config file looks like this:

<?xml version=”1.0″ encoding=”UTF-8″?>
<!DOCTYPE plist PUBLIC “-//Apple//DTD PLIST 1.0//EN” “http://www.apple.com/DTDs/PropertyList-1.0.dtd”>
<plist version=”1.0″>
<array>
<dict>
<key>Process Name</key>
<string>DeadlineSlave</string>
<key>Run As</key>
<string>farm</string>
<key>Idle Time Launch Delay</key>
<integer>15</integer>
<key>Startup Command</key>
<string>/Applications/Thinkbox/Deadline6/DeadlineLauncher.app/Contents/MacOS/DeadlineLauncher -slave -nogui</string>
<key>Shutdown Command</key>
<string>/Applications/Thinkbox/Deadline6/DeadlineSlave.app/Contents/MacOS/DeadlineSlave -shutdown</string>
</dict>
</array>
</plist>

For process name, choose any value that is appropriate.  Run as is the user that the process will execute as. Pick any valid user besides root. The idle time launch delay is the idle time, in minutes, that the daemon will wait before it executes the startup command. The startup command will be executed when the machine has gone idle for the set amount of time. When the user moves the mouse or hits a key on the keyboard, the shutdown command will be executed. To add multiple commands to execute, simply copy and paste everything between <dict> and </dict> including the tags, and enter new command specifications.

If you wish to edit configuration parameters for the daemon, such as log file destination, edit /Library/LaunchDaemons/org.n3d.idleexecd.plist. The -p 1 command line argument is the polling interval, in seconds. Leaving this default will cause the daemon to check the idle time every second. This can be increased to 10 seconds, but when the user interacts with the machine, they may have to wait up to 10 seconds before the daemon responds to the input. The -v argument specifies verbose logging. The default location for logging is /var/log/idleexecd.log.

Last, reboot your machine for the changes to take effect.

TL;DR: Download and install idleexecd to have your OSX 10.9 workstation participate in a Deadline 6 render farm after it has been idle for 15 minutes.

Adding a .3DL file to Hiero’s Viewer

1. Copy the .3dl file into the following directory:

/Applications/Hiero1.6v1/Hiero1.6v1.app/Contents/Plugins/OCIO/nuke-default/luts

2. Edit the following file in your favorite text editor:

/Applications/Hiero1.6v1/Hiero1.6v1.app/Contents/Plugins/OCIO/nuke-default/config.ocio

3. Look for the section in the file that specifies the display luts. It looks like this:

displays:
  default:
    - !<View> {name: None, colorspace: raw}
    - !<View> {name: sRGB, colorspace: sRGB}
    - !<View> {name: rec709, colorspace: rec709}

4. Add another view definition for your custom LUT:

    - !<View> {name: LogCRec709, colorspace: LogCRec709}

5. Go to the very end of the file, and add a colorspace definition:

  - !<ColorSpace>
    name: LogCRec709
    family: ""
    equalitygroup: ""
    bitdepth: 32f
    description: |
      Conversion from Alexa LogC to Rec. 709
    isdata: false
    allocation: uniform
    allocationvars: [-0.125, 1.125]
    from_reference: !<FileTransform> {src: LogC_to_Rec709.3dl, interpolation: linear}

6. Restart Hiero

And that should do it.

On Quicktime and Gamma shifts

The desire of users in the post-production community has always been simple. When you encode a Quicktime movie, it should look the same on every computer that you view it on as the machine it was encoded on. Has this ever worked? Not exactly. Here’s why.

PCs and Linux systems have long used a display gamma standard known as sRGB. This is roughly a gamma curve of 2.2, with a few notable exceptions, the most significant being the Mac. Until the release of MacOS 10.6 (Snow Leopard), Macintosh systems used a display gamma of roughly 1.8.

Many common still image formats, such as JPEG and PNG, contain explicitly-encoded values. The gamma curve of the display is baked in to the image data by the machine that encoded it. If it was done on a PC, that curve is roughly 2.2. If it was done on a Mac, that curve was roughly 1.8. Certain types of movie files, such as Quicktime and MPEG, also have these values explicitly encoded. In theory, if you encoded a JPEG image on an older Mac, it would look dark on a PC. If you encoded that same image on a PC, it would appear bright and washed out on the Mac.

For still images, this problem was addressed years ago by the International Color Consortium, with the development of ICC Profiles. JPEG files, for example, are encoded using the international ISO/IEC 10918-1 standard. So, when a piece of software, like Photoshop, displays a JPEG image, it is aware of the platform and operating system upon which it runs, and it will compensate for this discrepancy in its image decoding process.

The same applies for many types of video standards, like MPEG. MPEG video is converted first into the Y’CbCr colorspace, commonly used in television, compressed, and encoded. MPEG, however, is an open standard. The same is not the case for Quicktime, which is a proprietary format developed and controlled by Apple.

In theory, Quicktimes are decoded with a gamma of 1.8, and encoded with a gamma of roughly .55. This matches the legacy Macintosh systems that the format was originally developed for. The major issue here is that the Quicktime format is designed to be a simple container. As such, it does not mandate a certain colorspace, profile, or gamma curve be used. A Quicktime file is a collection of atoms. Some of these atoms are tracks that contain either raw video or audio data. Others are metadata that describe the content contained within the file. It is assumed that the raw data is encoded with gamma .55, as mentioned above. However certain atoms can contain gamma values, color transformation matrices, and more recently color profiles.

Since Quicktime is a closed standard, Apple can add atoms to the container, and add support for those atoms to the pieces of software that it maintains. However, this becomes an ugly, nasty mess when you start thinking about 3rd-party applications that may use older versions of the Quicktime libraries to either encode or decode and display these files. This is further compounded by the display gamma discrepancy between older Macs and PCs. Apple has devised various schemes over the years to compensate for this, and to attempt to ensure uniform appearance of color across multiple devices, from print to acquisition to display. For Quicktimes, Apple has created a series of atoms which define some sort of color transform, which I will explain in detail below.

The ‘gama’ atom

The first of these display metadata atoms to surface was the ‘gama’ atom. This was designed to describe the gamma curve that was used to encode the video data. Suppose we take a Quicktime file that was encoded on a PC. Providing the PC used Apple’s Quicktime library under the hood, the resulting Quicktime would have a ‘gama’ tag set that would indicate the PC encoding gamma. You would open this file on Quicktime on both Mac and PC, and providing you used Apple’s Quicktime player, it would look the same on both monitors. The problem for those of us in post production was always the Avid. Avid used the Quicktime API to simply read the raw video data in from the file. Since older versions of Avid were not aware of the ‘gama’ atom, they did not know to apply a slightly different gamma curve to the imagery to get it to display correctly. This resulted in film editors calling VFX vendors all over town with the exact same complaint: “How come your Quicktimes look dark on my monitor?” Frantic Films released a small utility called “QuicktimeGammaStripper”. This would simply remove the atom from the file, so it would look the same between Quicktime player and Avid.

The ‘nclc’ and ‘colr’ atoms

Around the release of Snow Leopard, we started to see a ‘nclc’ atom instead of a ‘gama’ atom. For an incredibly detailed, make-my-head-hurt explanation, check out Apple’s Developer website. The idea behind this is incredibly well-intentioned, and was an attempt to compensate how different display devices will alter outgoing image data from the filesystem to our eyes, and how different digital camera sensors (and film scanners, for that matter) will alter incoming data from our eyes to the filesystem. This becomes problematic when encoding Quicktime files out of Nuke. Nuke takes linear image data, puts it through a look up table and also through a gamma curve, and displays it on the screen. When we apply the same LUT and gamma curve and write out a Quicktime, it should look the same in the Quicktime player as it does in Nuke, right? Wrong. Beginning with Nuke 6.0, the Foundry has changed how Quicktimes are encoded internally. The result is that Quicktimes written out of newer versions of Nuke are tagged with the ‘nclc’ atom, and the Quicktime player applies a transformation matrix that results not only in a gamma shift, but frequently a hue and saturation shift as well. The work-around for this was to find an old Mac or Windows XP machine, and use Nuke5.2.

Sadly, Nuke 5.2 is starting to no longer be a viable solution, given the age of the application, and that it no longer runs on newer versions of Mac OS. Right now, the conventional wisdom seems to be to perform all of your color transformations in Nuke, but write out a sequence of PNG images with “raw data” checked. From there, these image sequences must be transcoded into a Quicktime by another piece of software. Robert Nederhorst has an excellent tutorial on how to do this with FFMpeg, an open-source (and free) product. It is located here. Tweak Software also offers an incredibly full-featured and useful conversion tool called rvio. It is available for purchase for $199, and can be found here.

Yet another alternative would be to re-write the gamma stripper utility for newer versions of MacOS, and to also support the ‘nclc’ atom. I have done a bit of research on this, and will take a stab at it when I get some free time. First, there are three Quicktime APIs available from Apple, which I will detail below.

Quicktime

This is Apple’s legacy, C-based 32-bit API. It is built on top of Carbon, and has been around since the nineties; it pre-dates MacOS X. Apple reluctantly continues to support this code as it does not want developers to be forced to re-write massive amounts of code. However, Apple has indicated in no uncertain terms that the Quicktime API is nearing end-of-life, and as such no new development should use it.

QTKit

QTKit is Apple’s Objective-C based Cocoa API for Quicktime. It is currently supported in all newer versions of MacOS, and is 64-bit capable. Sadly, it is not very full featured, and lacks many of the functionality that developers look for, including removing and adjusting atoms.

AVFoundation

AVFoundation was originally introduced as part of iOS 3, as a new way for iOS devices to access and edit audio-visual content. It provides the type of low-level access that was missing from QTKit. As of MacOS 10.7 (Lion), Apple has ported this code from iOS to MacOS. It is not supported on platforms other than MacOS 10.7 and 10.8. Apple has stated that if you do not need to support legacy operating systems in your code, all Quicktime development should be done using AVFoundation going forward. It is built on top of Cocoa, and is fully 64-bit compliant.

It looks like I will have to write the gamma stripper using AVFoundation. Now, does anyone have any example code I can use? 🙂